Add or edit an item
What it's for
A menu item is a single thing a guest can order. This guide covers the everyday Simple item; the same editor also builds combos, specialty items, and retail/counter products from its other tabs.
Menu items are managed on the web dashboard and on the iOS/Android apps — the same fields, laid out for each device. This guide shows the web editor.
Start
- New item: on the Menu page, choose Add Item.
- Edit an item: choose the pencil icon on any item.
At the top of the editor, leave the build type on 🍽️ Simple Menu Build. (The other tabs — 🍱 Combo, ⭐ Specialty, 🧃 Retail / Counter — are for those special kinds of item.)
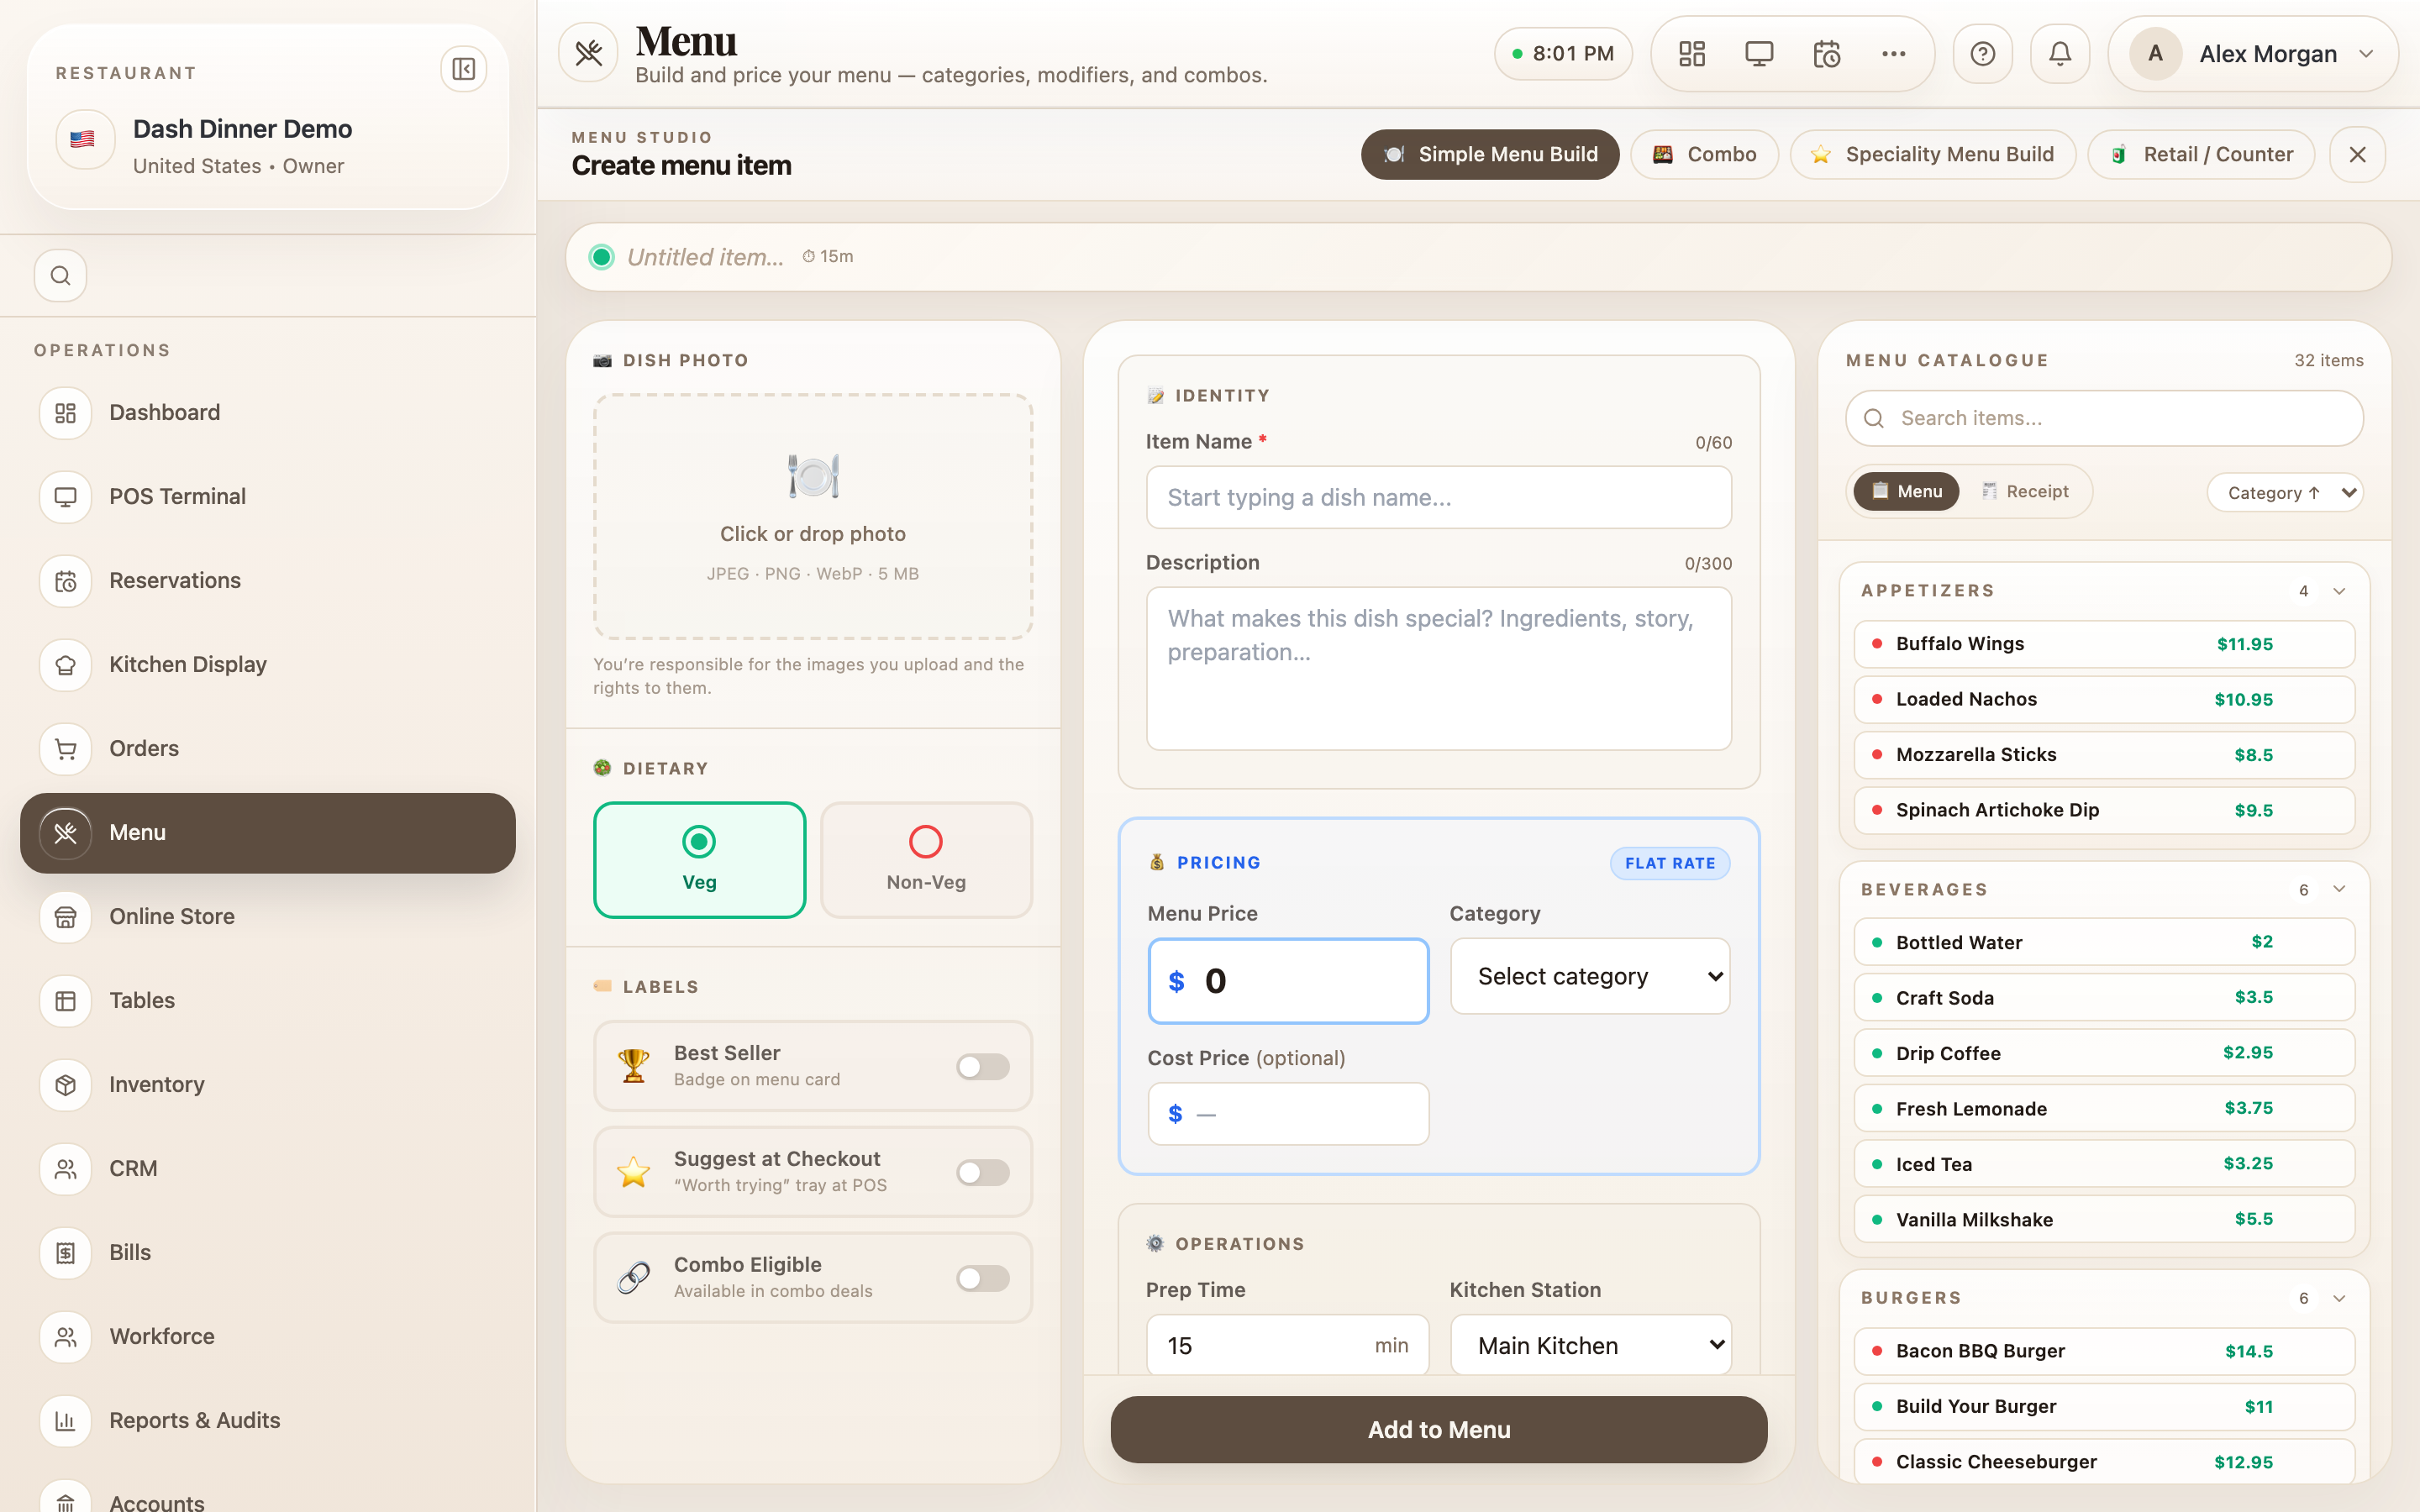
Fill in the item
Photo and flags
- 📷 Dish Photo — choose "Click or drop photo" to upload (JPEG / PNG / WebP, up to 5 MB). A good photo lifts online and QR-menu orders noticeably.
- 🥗 Dietary — set Veg or Non-Veg.
- 🏷 Labels — optional badges: Best Seller, Suggest at Checkout (a "worth trying" nudge at the POS), and Combo Eligible.
Identity
- Item Name * — required; what guests see.
- Receipt short name — optional shorter name for receipts and kitchen tickets (there's an Auto-suggest if you want one generated).
- Description — optional.
Pricing
- Menu Price — the price guests pay. A live tax breakdown shows beneath it, so you can see what's tax-inclusive.
- Category — choose which section it belongs to.
- Cost Price (optional) — enter it and DashDinner shows the Gross margin live, so you can price with confidence.
Operations (kitchen routing)
- Prep Time — minutes; feeds the kitchen's timing.
- Kitchen Station — which station cooks it. This is what routes the item on the Kitchen Display.
- Item Code (optional) — a short code for fast POS entry.
Dietary & attributes
- Spice Level — from 🌶️ Mild to 🔥🔥 Extra Hot.
- 🥦 Vegan and 🌾 Gluten-Free toggles, plus allergen labelling.
- 🍺 Happy Hour — set a separate price and a start/end time if the item is discounted during happy hour.
Save
Choose Add to Menu for a new item, or Update Item when editing. It's live immediately (unless you've held it — see availability below).
Taking it on or off the menu
Availability isn't set in this form — it's toggled from the Menu list, where each item shows In Stock or Off. This keeps 86-ing a dish a one-tap job during service.
Worked example
Add a Paneer Tikka at ₹280. Choose Add Item, upload a photo, set Veg, name it Paneer Tikka, set Menu Price to 280 and Category to Starters. Under Operations pick the Tandoor station so it prints there, set Spice Level to 🌶️ Medium, and choose Add to Menu. It's now orderable on the POS and routed to the tandoor.
Tips & things to watch
- ✅ Set the Kitchen Station on every item — it's what makes station filtering and per-station printing work on the Kitchen Display.
- ✅ Add a cost price to see live margins while you set the menu price.
- ⚠️ A photo helps most where guests self-order (online / QR) — those menus lean on the image.