The Floor Plan designer
What it's for
The Floor Plan designer lets you draw your restaurant to scale — place tables, mark out areas, add fixtures like the bar and kitchen — and then publish it to the POS so those tables become real, orderable tables. It's the visual alternative to adding tables by hand.
Floor Plan is part of the floor-plan module. If you don't see it, it isn't enabled on your plan.
Where to find it
Choose Floor Plan in the sidebar, or the Floor Plan button on the Tables screen — they open the same designer.
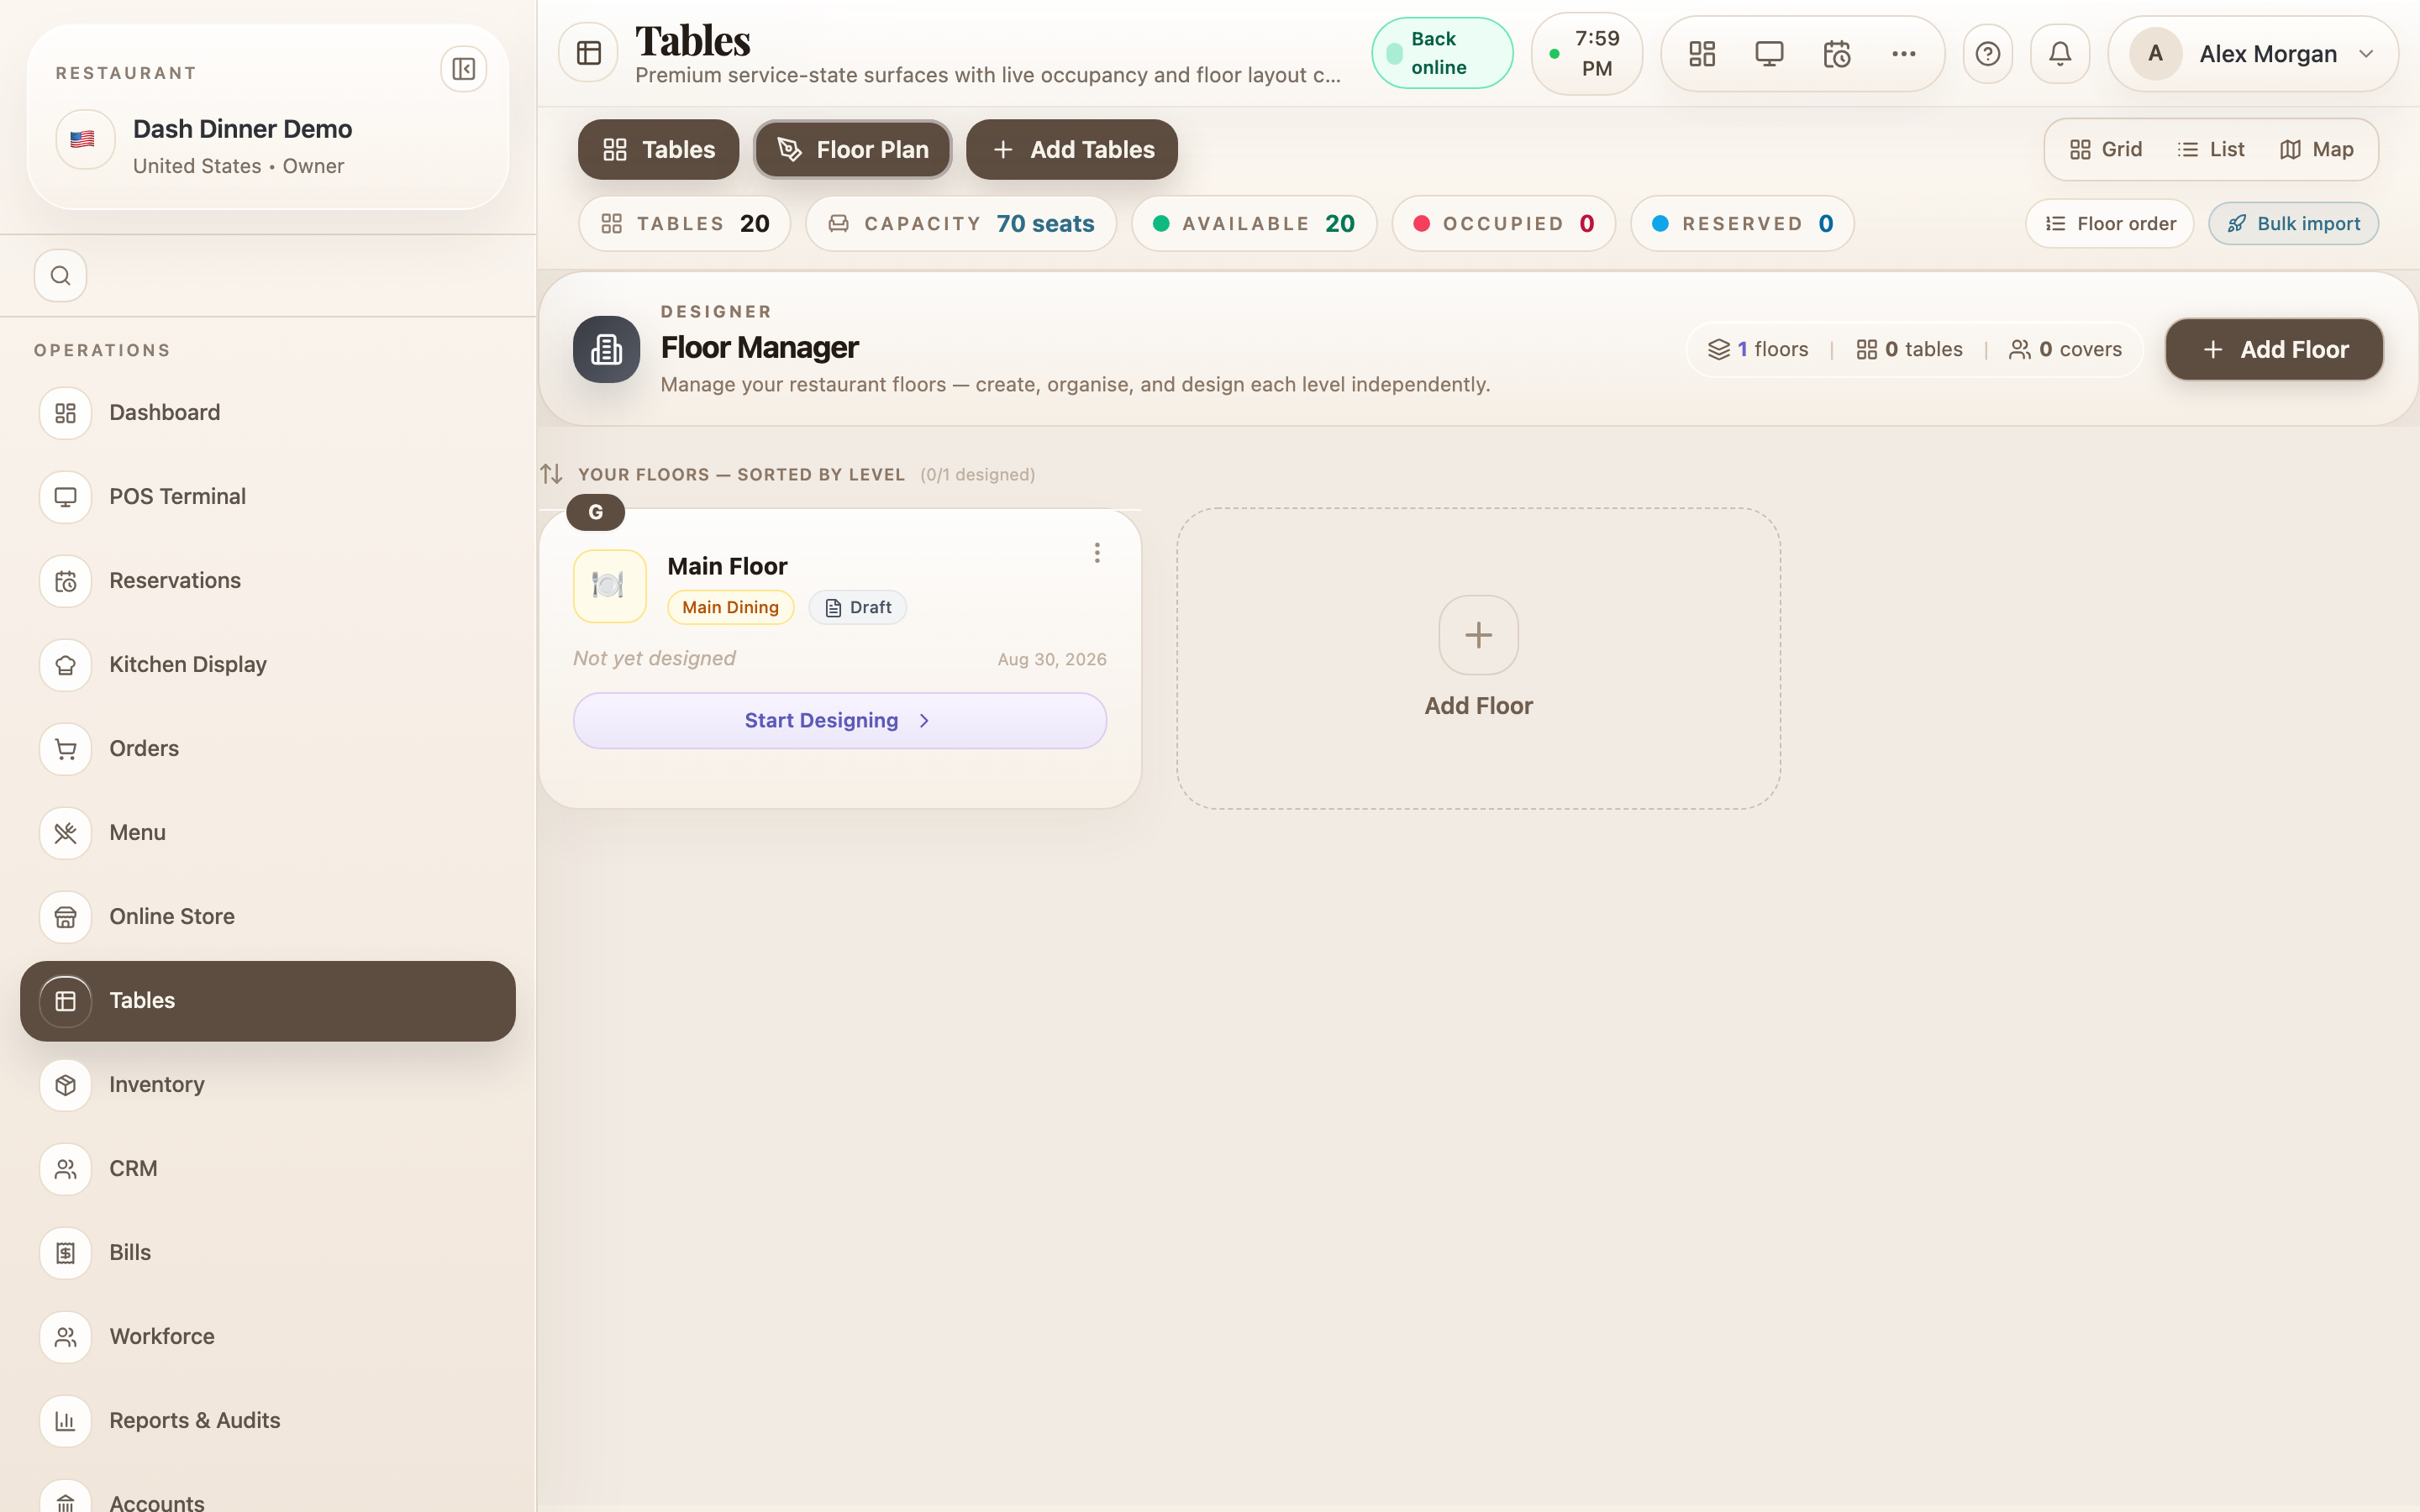
Floors
The designer opens on the Floor Manager, where each level of your restaurant is its own floor. Choose Add Floor to create one (ground floor, rooftop, and so on). Each floor card shows its status — Draft, In Progress, or Complete — with Start Designing to open it.
Start a layout
When you open a floor you get a gallery with three ways to begin:
- Floor Templates — start from a ready-made layout and adjust it (Customise This Template or Use As-Is).
- Smart Build — a short wizard that arranges a layout for you.
- Blank Canvas — design from scratch.
Place tables and fixtures
In the editor, the left Elements palette holds everything you can place. Click an element to select it, then click the canvas to place it ("Click to select → click canvas to place"). Two groups:
- Tables & Seating — table shapes by capacity, e.g. Round 4-top, Booth 4-seat, Rect 8-top, Bar Stool.
- Zones & Structures — fixtures and areas like Bar Counter, Kitchen, Door, Plant / Pot, and named zones such as VIP Section and Outdoor Seating.
Edit the layout
- Tools (top toolbar): Select (V), Draw Room (R) to outline walls, and Move Floor (M) to pan. Delete with Del, cancel with Esc.
- Properties (right panel): click a table to edit its Label, Shape, Chairs / Capacity, size, position, and rotation (there's a Rotate 90° button).
- 2D / 3D: switch between the 2D editor and a 3D dollhouse preview (the 3D view is read-only).
- Undo and zoom are in the toolbar; the layout snaps to a grid as you place things.
Publish to the POS
Your work auto-saves (the button cycles Save → Saving… → Saved). To make the floor live, choose Publish to POS — you'll confirm "This will create table records and make them available for ordering." DashDinner creates the tables (the floor's name becomes their area). To take a floor back out of service, use Detach from POS.
Designing doesn't affect service until you publish. Publishing is what turns your drawing into real tables the POS can seat.
Worked example
Lay out the ground floor. Choose Add Floor → Ground Floor, open it, and pick Blank Canvas. Draw the room with Draw Room, place a Bar Counter and a row of Round 4-top tables, label them, and drop an Outdoor Seating zone for the patio. When it looks right, choose Publish to POS — the tables appear on the Tables floor, ready to seat.
Tips & things to watch
- ✅ Start from a template or Smart Build — far faster than placing every table by hand.
- ✅ Label tables as you place them so their numbers match how staff refer to them.
- ⚠️ Nothing goes live until you Publish — and publishing creates real table records.
- ⚠️ Leaving with unsaved changes prompts Save & exit vs Discard changes.