Manage tables & QR codes
What it's for
This is the setup side of the floor: creating tables, organising them into areas, editing their details, and getting each table's QR code so guests can scan to view the menu and order.
Add tables
Choose Add Tables. Numbers are generated for you from the area's prefix (M1, M2, M3…).
- Choose Multiple to create a batch, or Single table for one.
- Pick the Area (its Prefix fills in automatically), set a Start Number, and for a batch the Number of Tables. For a single table you can add an optional Table Label (e.g. Window Seat).
- Set Seats per Table.
- Check the Tables to be created preview — it flags any numbers that already exist and offers Auto-fix: Use next available number.
- Choose Create Tables.
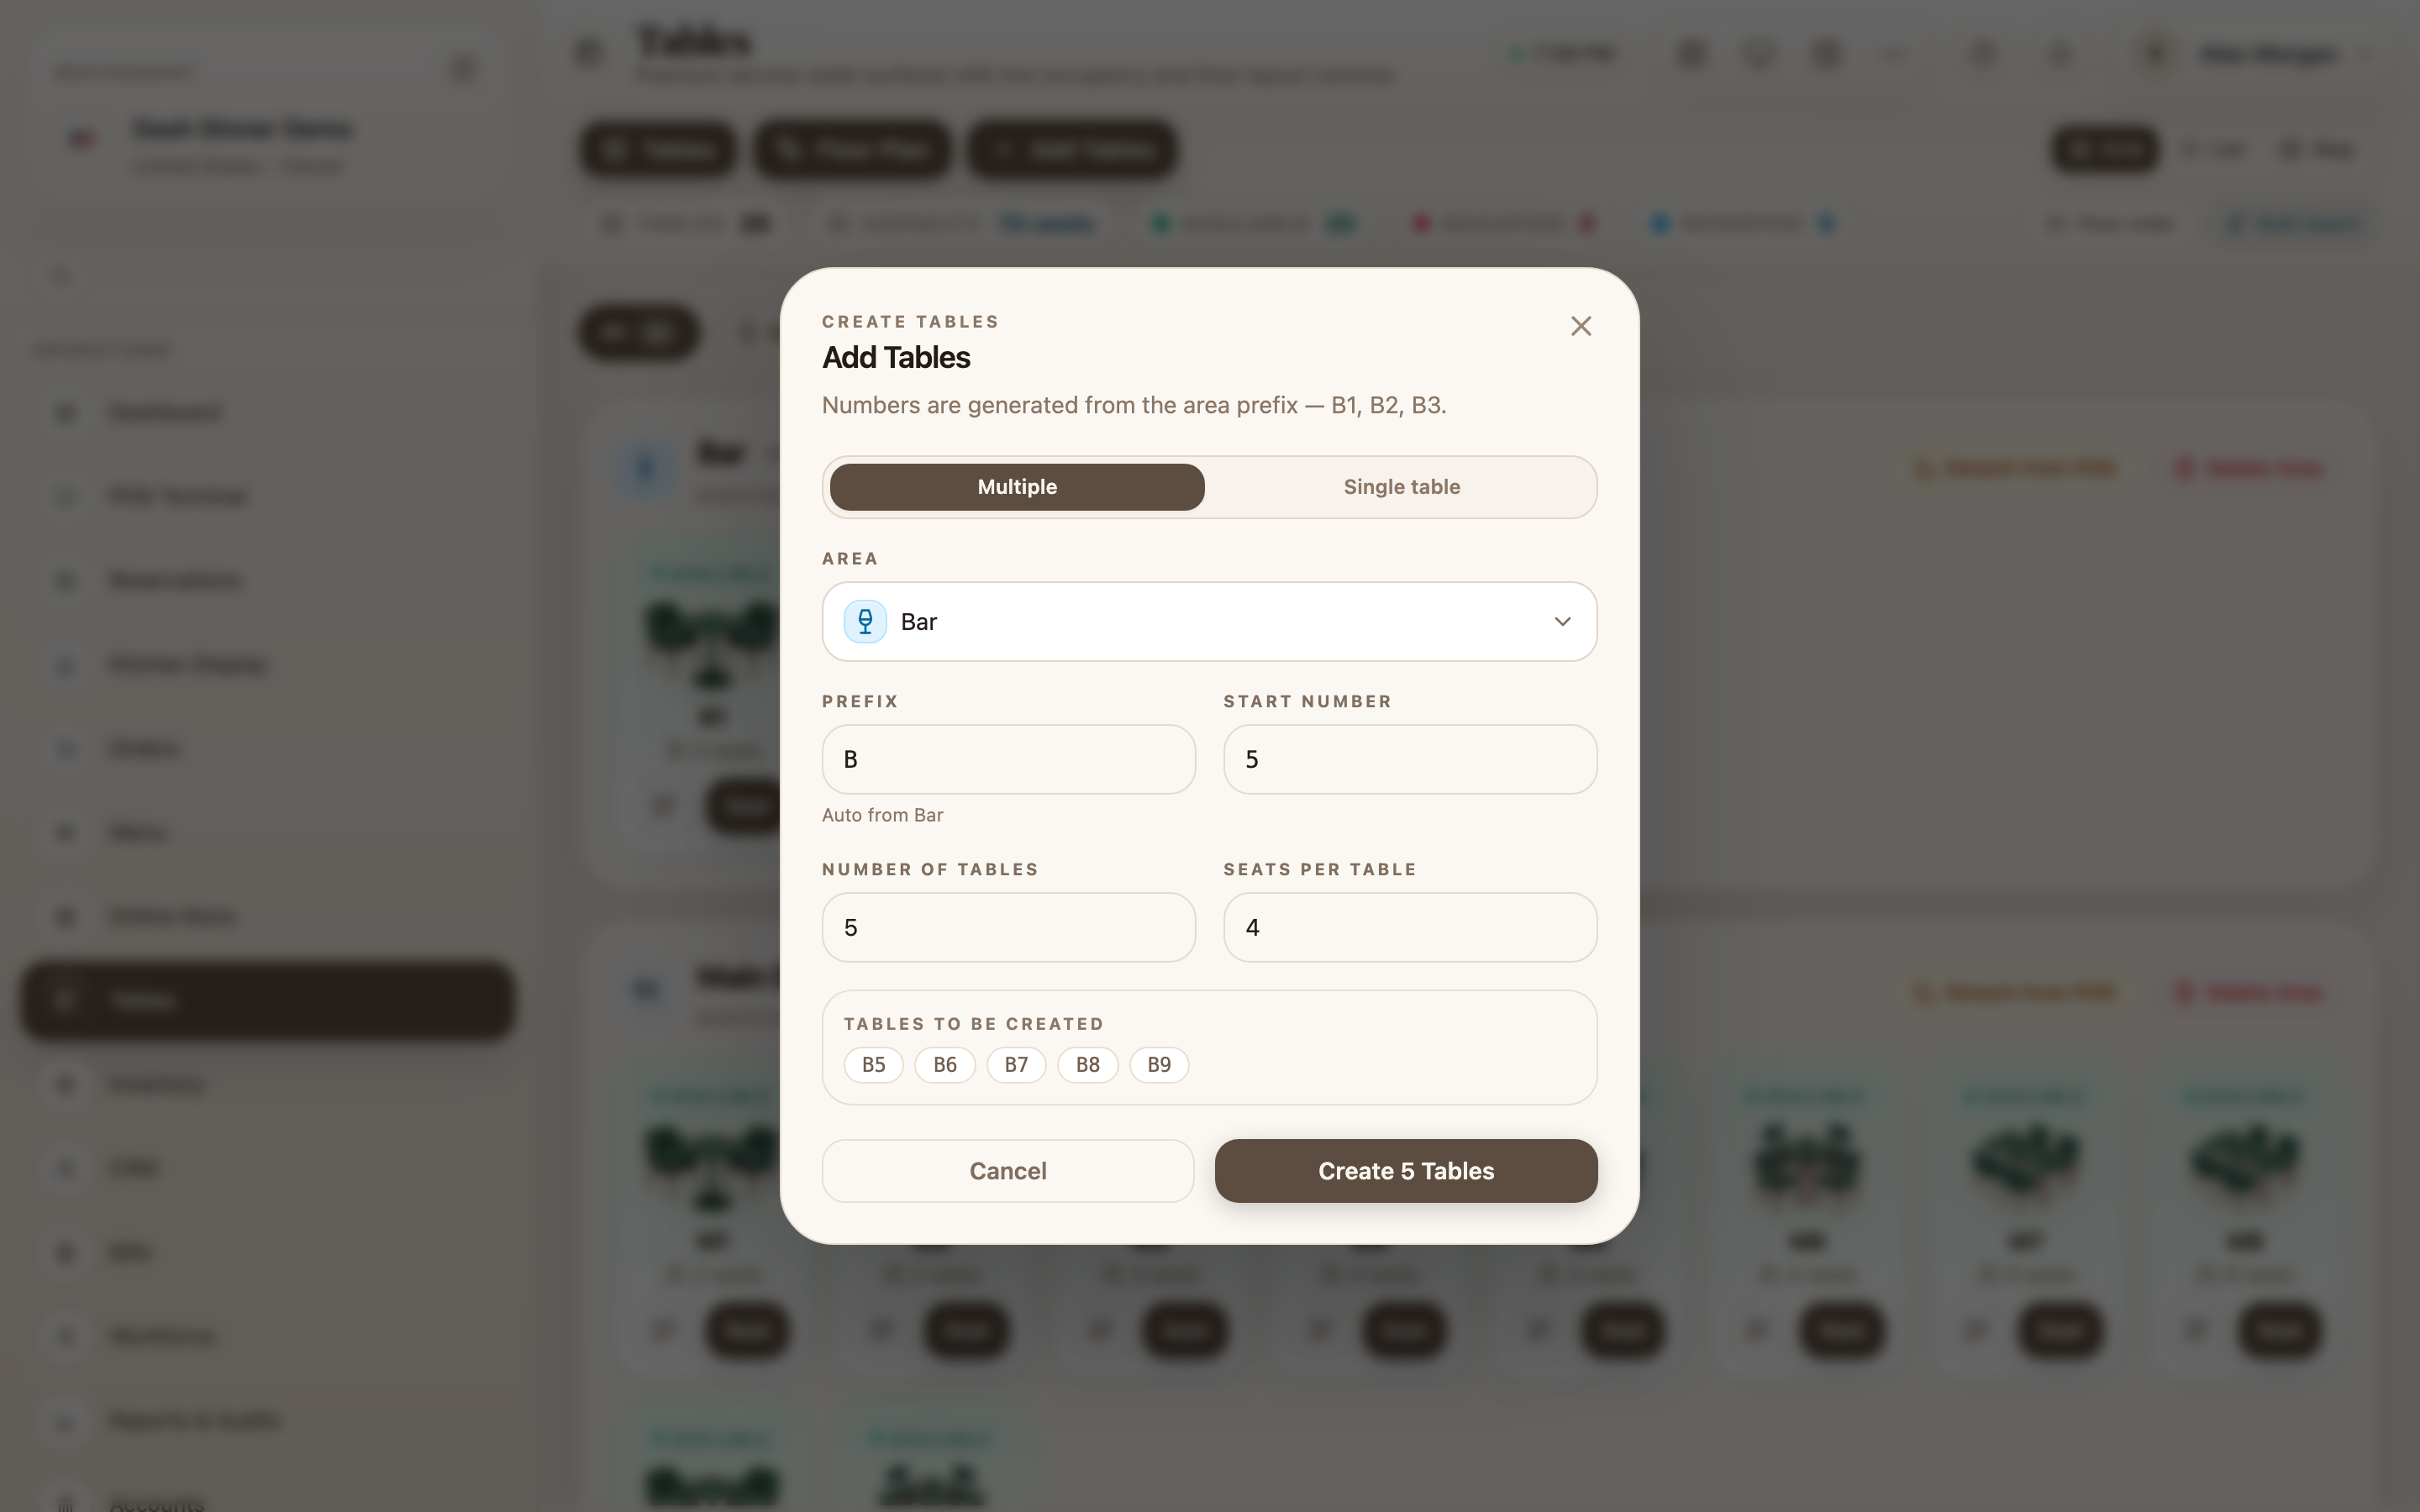
A table's number is its identity — {area prefix}{sequence} (M1, M2…) — and stays fixed;
moving a table to another area doesn't renumber it. The label is just a friendly name you can
change any time.
Edit a table
Click any table to open Edit. You can change its Table Label and Seats. The Table identity (prefix + number + area) is locked while the table is in service — take it offline to change those — and seats can't change while it's occupied. Save with Save Changes.
To retire a table, use Delete table (you'll confirm). Note that deleting a table stops its QR code from working.
QR codes
Each table has its own QR code for QR self-ordering. Choose the QR icon on a table to open it — it shows the code and the order link, captioned "Scan to view menu and order". Point a phone camera at it (or open the link) to see the guest's ordering page for that table.
QR codes are per table and shown on screen — display the code at the table (for example on a printed table tent you create from it). Deleting or renumbering a table invalidates its old code.
Areas
Tables are organised into areas (Main Dining, Outdoor, Bar & Lounge, and so on). Choose an area from the Area picker when creating or editing a table, or use Add custom area to make your own.
Each area header has bulk actions:
- Detach from POS / Bring Area Online — take a whole area offline or back into service.
- Delete Area — remove every table in an area.
Both are blocked while any table in the area is occupied.
Worked example
Set up a new patio. Choose Add Tables, pick Add custom area and name it Patio, set Number of Tables to 6 and Seats per Table to 4, and Create Tables — you get P1–P6. Open each table's QR icon to put a code on every patio table.
Tips & things to watch
- ✅ Let numbers auto-generate from the area prefix — it keeps numbering consistent and avoids clashes.
- ✅ Take a table offline to change its number or area; identity is locked during service to protect live orders.
- ⚠️ Deleting or renumbering breaks the QR code — reprint the code if you change a table's identity.