Schedule shifts
What it's for
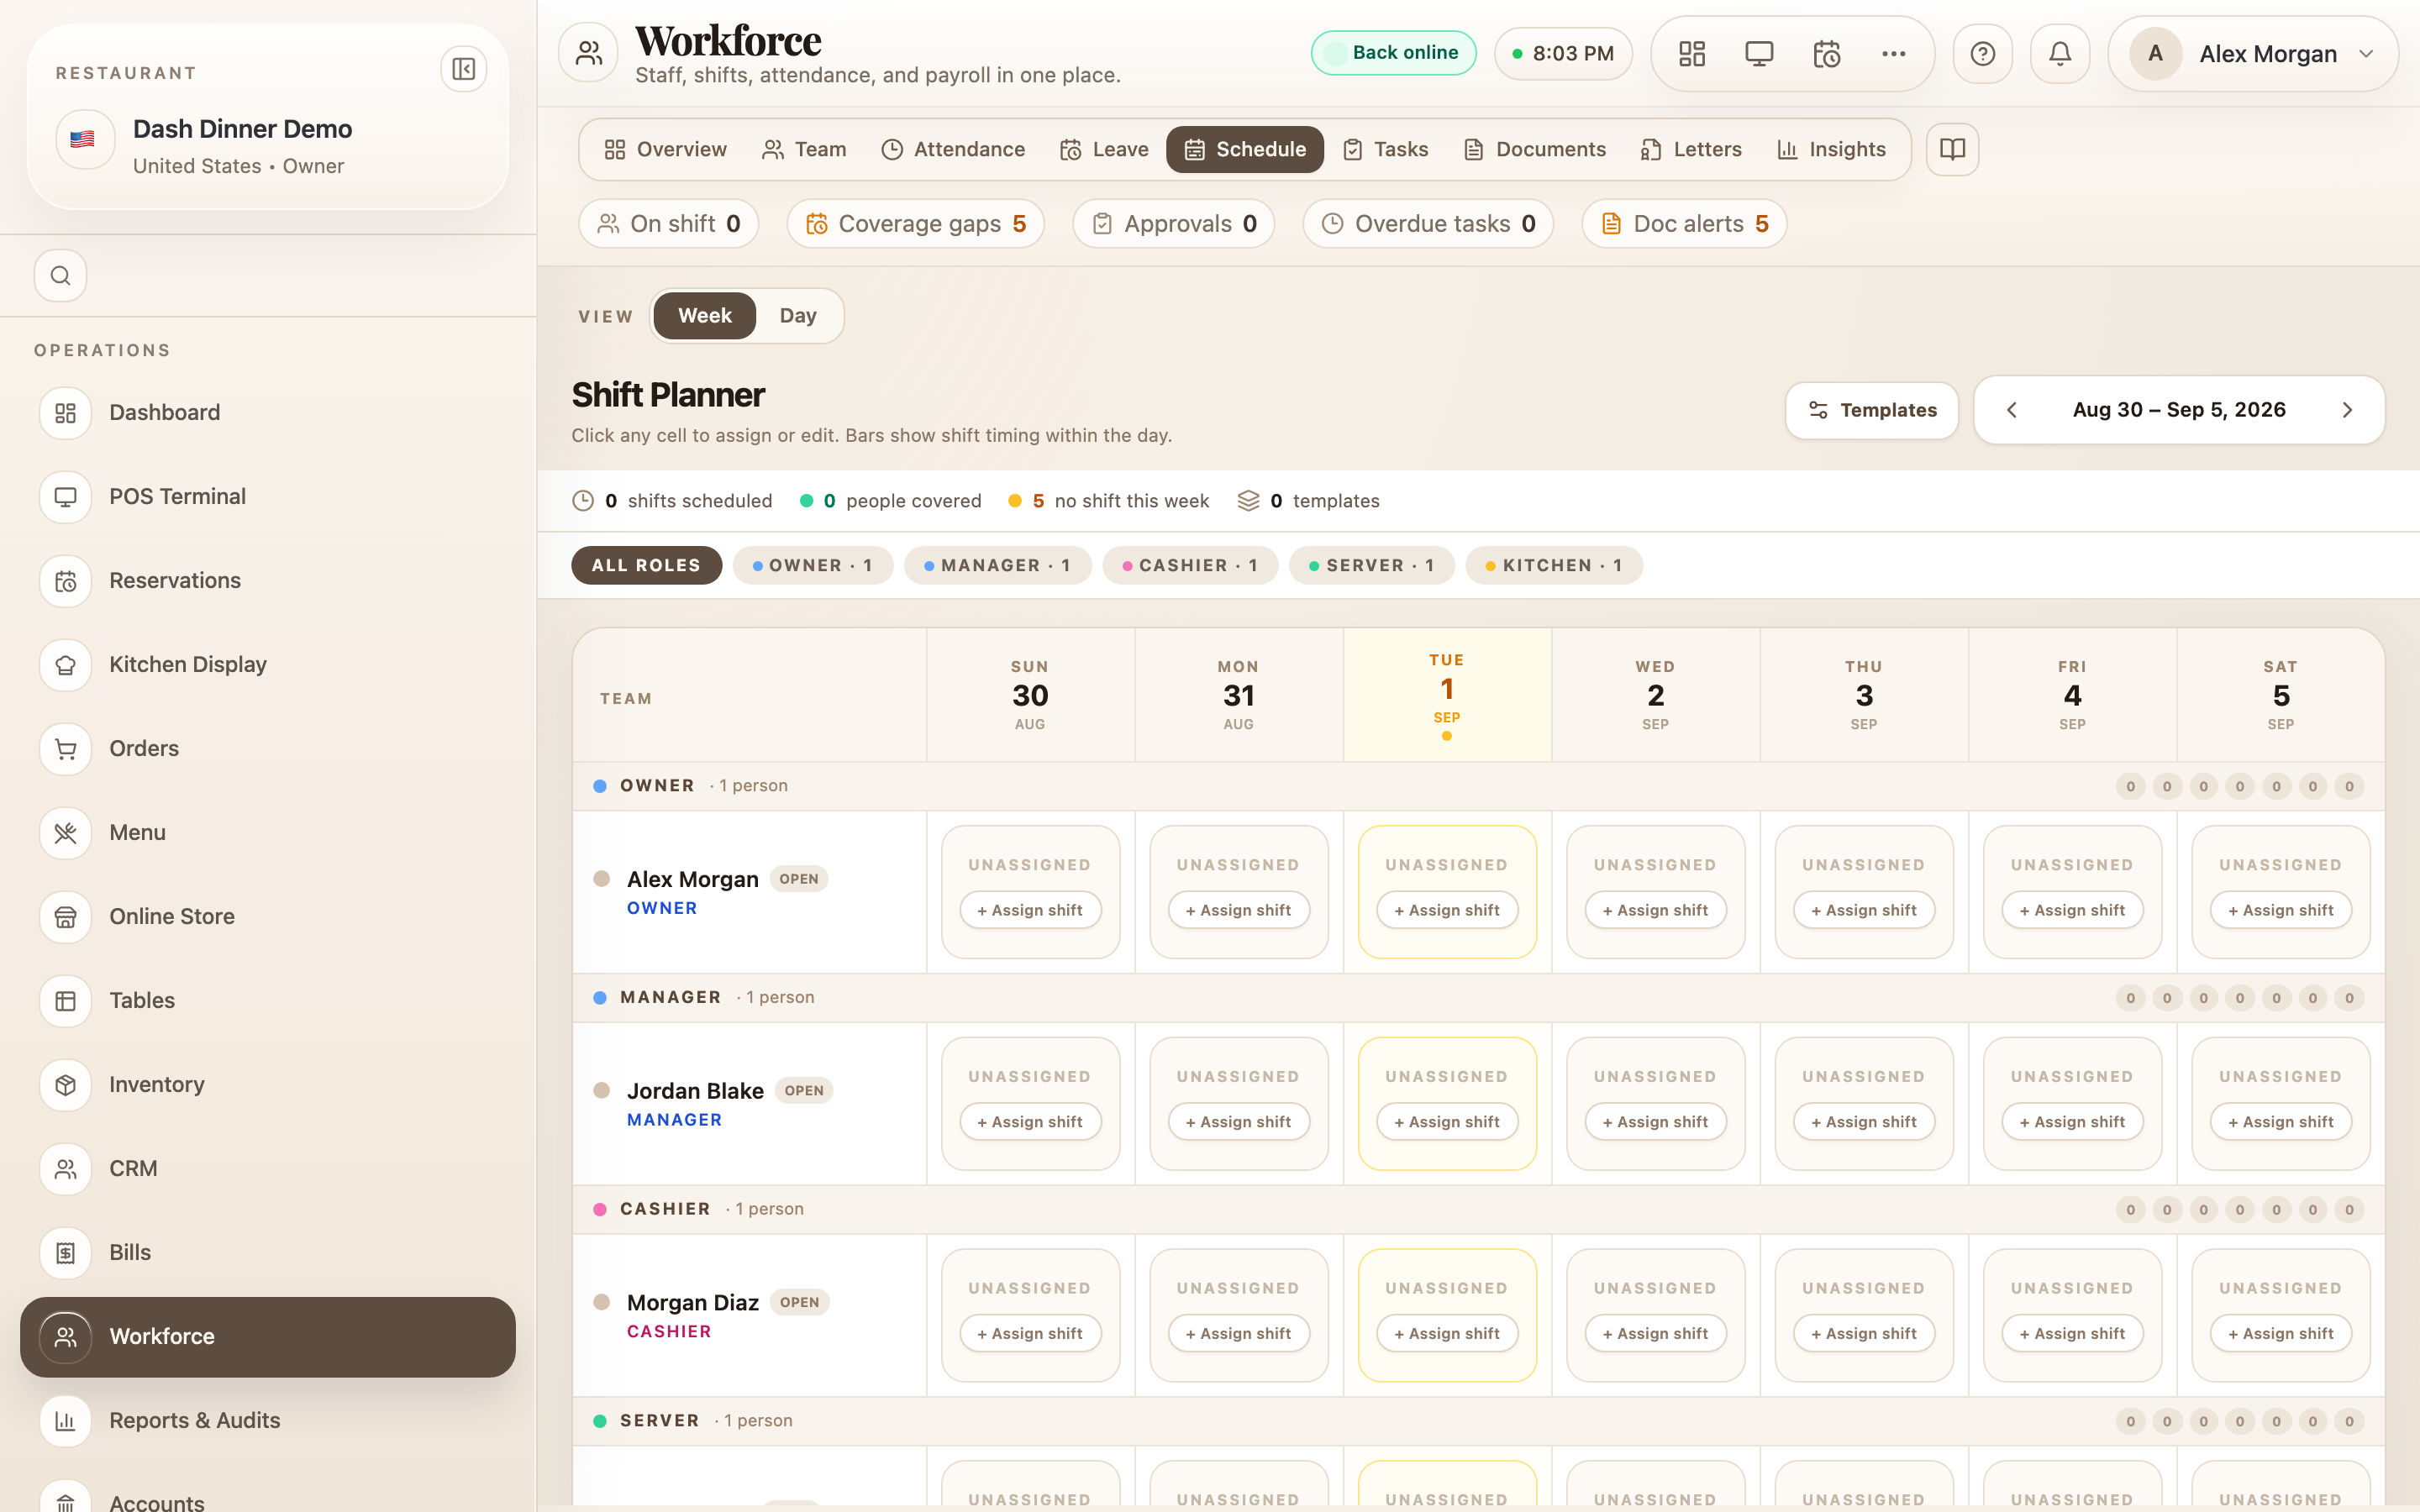
The Schedule is where you roster your team — who works when. You assign shifts on a weekly grid, and can save common shifts as templates to reuse.
Where to find it
In the Workforce hub, choose the Schedule tab. A View toggle switches between Week (the Shift Planner — staff down the side, the seven days across) and Day.
Assign a shift
- In the week grid, find the person's row and the day's column, and choose + Assign shift in that cell.
- In the assign window, set:
- Shift name (optional).
- Shift type — Morning, Afternoon, Evening, Night, or Custom.
- Schedule — a Start time and either a Duration or an End time (quick "+Nh" buttons help).
- optionally a Work area (segment, floor, or station) and Notes.
- Choose Assign shift. It's on the board immediately.
To change a shift, click it again and choose Update shift, or Clear shift to remove it.
Reuse a shift as a template
In the assign window, tick Save as a new shift template to reveal a Template name, an optional break duration, and the Applicable roles it suits. Saved templates then appear in the Template dropdown so you can drop the same shift onto anyone in a click.
There's no separate "publish roster" step — a shift goes live the moment you save it, and the person can see it. Approved leave shows up on the planner automatically, so you don't double-book someone who's off.
Worked example
Roster the evening service. On the Schedule tab in Week view, choose + Assign shift in Priya's Friday cell, set Shift type to Evening, Start time 17:00 with a 6-hour duration, and Assign shift. Tick Save as a new shift template named Evening 5–11 so you can reuse it for the rest of the team.
Tips & things to watch
- ✅ Build templates for your standard shifts — rostering a week becomes a few clicks.
- ✅ Check the planner for leave before assigning — approved time-off is already shown there.
- ⚠️ Shifts publish on save. There's no draft mode, so assign when you're ready for staff to see it.